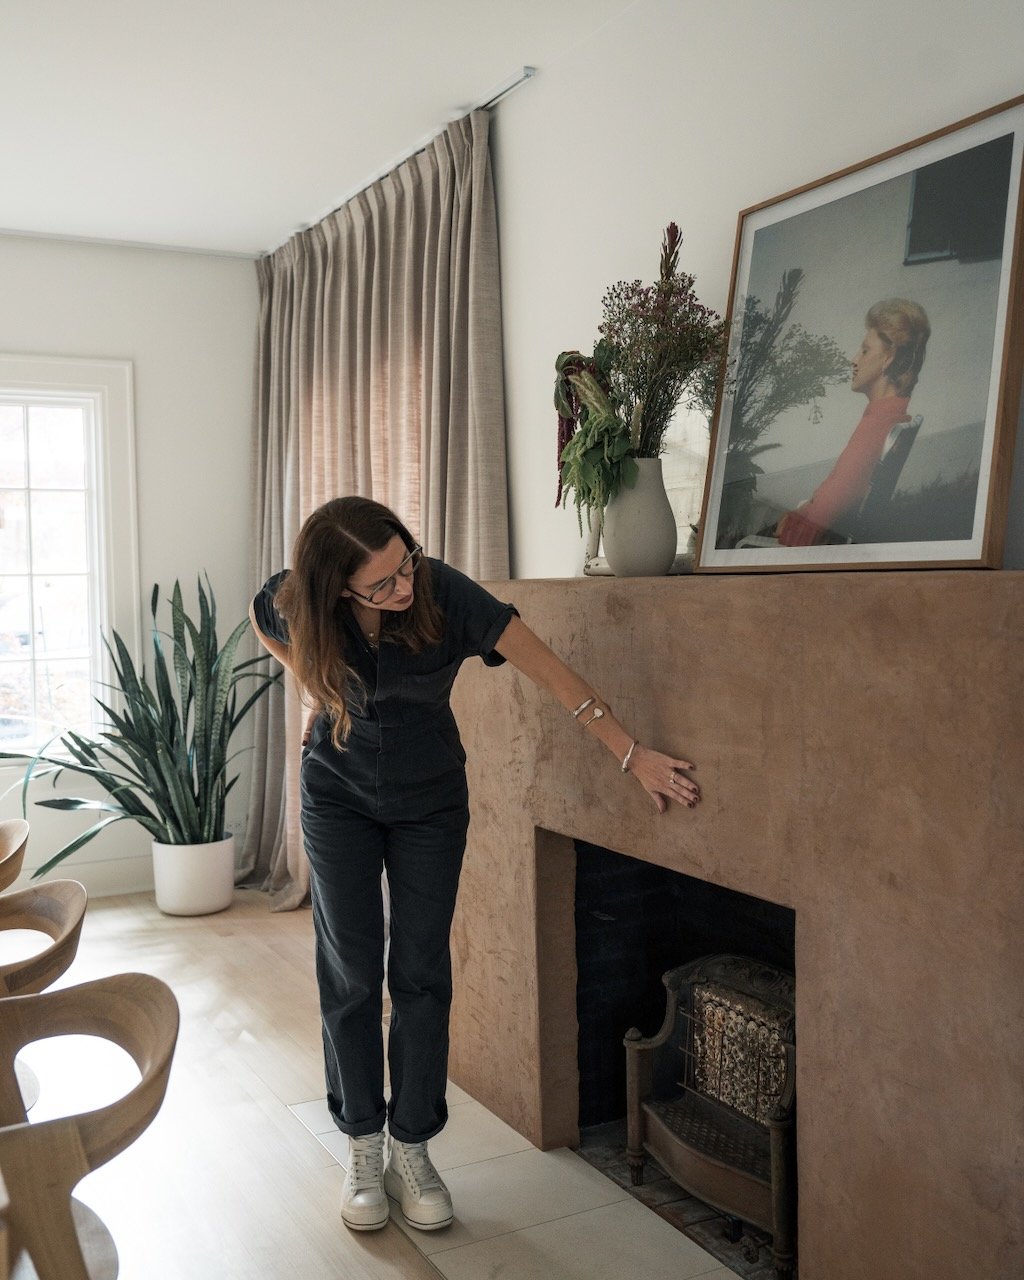
Touch and Feel - My love for Micro-cement
I began experimenting with limestone and microcement many years ago, and my love for these materials has only grown stronger over time. While there are countless wall treatments available, I’ve primarily worked with a few. Most recently, I’ve been using the brand Surecrete—mainly because of its affordability but Surecrete is a cement based interior wall appliqué.
Photo by : Justin March -“ Surecrete walls that were painted with a matte paint color called MAROONED- by Sherwin Williams”
Exploring Different Wall Treatments
One option for wall treatments is limestone. It has its pros and cons.
Pros: Limestone is highly durable and offers excellent texture for showers since it resists bacteria and mold.
Cons: It’s quite expensive, which can make it a less accessible option.
Another fascinating material is Tadelakt, which is also limestone-based. I haven’t personally worked with Tadelakt yet, but from my research, it offers more color options and has a distinctly European aesthetic. It’s definitely on my list to try.
Microcement, on the other hand, is made from cement rather than limestone and delivers a sleek, matte finish. Surecrete, in particular, offers a wide variety of colors. So far, I’ve worked with three or four different shades and have been impressed with the results.
My Experience with Surecrete
I got my husband involved in the Surecrete journey, and our fireplace was the first project he tackled. My own first experience was at a flower shop in Nashville. The owner and I spent too long, exhausting days on the project, ending up covered in concrete from head to toe. It was one of those “never again” moments—but the results were so stunning that I’ve kept it in my design toolbox ever since.
Here’s a before picture of my fireplace:
Here is the after:
We initially planned to keep the original brick, but years of paint buildup, broken pieces, and loose sections made that impossible. Instead, we kept the brick framing and covered it with microcement. The transformation was incredible. If you’re not a DIYer, I recommend asking your sheetrock or bricklayer tradespeople for help. Even if they’ve never worked with microcement before, they’ll likely find it straightforward—it’s almost like applying peanut butter to walls.
Tips for DIY Microcement Projects
If you decide to tackle this yourself, here are some important tips:
When adding color to the mix, ensure it dissolves completely in the water. Otherwise, you might end up with streaks of unexpected hues like black, yellow, or pink. Don’t panic—these can be sanded out and corrected.
Consider the ceiling when applying microcement in a bathroom. Many people overlook the ceiling, but treating it as part of the design creates a cohesive and finished look.
Microcement is a versatile and stylish way to enhance walls, fireplaces, and bathrooms. Here are a few photos I found of spaces that feel incredibly cohesive and “Yum the Room”-worthy.
Images taken from the book - “Designers Next” by BetaPlus Publishing”
Image taken from the book - “Designers Next” by BetaPlus Publishing”
Images taken from the book - “Designers Next” by BetaPlus Publishing”
Here’s a photo of an in-progress bathroom in my back house, which will also serve as my office. It currently has just one coat of microcement:
Lessons Learned
Some people experiment with adding paint directly to their concrete mix. I haven’t tried this myself because it makes me nervous. Instead, I stick to color packets, although they can be hit or miss on the shade. For example, my terracotta light-brown fireplace turned out beautifully but the swatch was a lot darker and it came out a lot lighter. It was the first project where I achieved color with preserving the patina I love so much.
Final Thoughts
I hope these ideas inspire you to experiment with microcement in your own home. Feel free to reach out with any questions about the process—I’m happy to share what I’ve learned!
Much Love, Jessica


